Wednesday, December 28, 2011

A Cricket (Loom) by the Hearth

Some of the best memories of Christmas are about playing with all the new toys. Naturally, I had to play with my new toy, my Schacht Cricket Loom. Day after Christmas I ran through all the instructions to warp the loom, then ran through them again to do it right, then sat down to weave the striped scarf, which is the project in the accompanying booklet that goes with the yarn provided.


The weaving goes surprisingly fast, especially working a narrow width in worsted-weight yarn.


Much faster than knitting a similar-sized object, as weavers probably all know already. By the end of the day I had this:


Okay, so the selvages are a little wobbly and there are some mistakes here and there, but it's my first loom-woven project!

The Cricket, being a rigid heddle loom with only one heddle and a 10" width, is pretty limited in what it will do. Nevertheless, I plan to push those limits and see what all I can make it do before I run out and buy something larger and more complex. I see there's a lot of vocabulary to learn as well.

Seeing how quickly I wove my project, my son decided to give it a go. As a starving student, he doesn't have a lot to spend on presents, and he wanted something nice to give to his girlfriend. I don't have much worsted weight yarn, but we did some stash diving and came up with enough Lion Brand Organic Cotton to make a scarf.

I helped James warp the loom and he set to:


And a few hours later, he had a scarf made, too.


"Do you like it? I made it myself!"

Monday, December 26, 2011

A flock of FOs: Striped socks, Iced, and Clarissa.

One thing about having multiple projects on the needles, is that if they all get finished about the same time, it makes one look like a prodigiously productive knitter. Of course, that generally means they've all been on the needles for some time, making one look like a prodigious piker.

Three projects just came off the needles -- one very long term, one that I cast on in the summer, and one that was cast on in November.

I'll start with the one that's been around the longest. Not the most complicated. Actually the most simple. Just a pair of plain stockinette socks, using the sock recipe from Knitting Rules by Stephanie Pearl-McPhee, in self-striping yarn that I dyed myself from a KnitPicks sock blank.


The only reason they took a long time is that I like to keep a pair of plain socks in self-patterning yarn on the needles to pick up at odd moments, so they only get worked on here and there. But now they're done.


Next up, let's look at Iced, a cardigan from a past issue of Knitty. I bought three fat skeins of Cascade Eco+ when a local yarn shop went out of business, and used about half of it to make this cardigan.


It's an easy, comfy, cozy cardigan to throw on when it's chilly. Goes well with jeans.


May need a little more blocking in the back, though.

And finally, the showpiece. Last summer at Sock Summit 2011, I was going by the Sanguine Gryphon booth when I came to a full stop in front of this:


Had to have. Had... to... have. I was directed to the White Lies Designs booth, where I found the pattern for the Clarissa cardigan. The Gryphon didn't have enough of the yarn that the sample was made from in either the ruby red or the deep purple that I liked, so I wandered around until I found a beautiful BFL DK from Fly Designs.

I cast on shortly after Sock Summit. Just before Christmas, I finished.

The front:


The back:


It still needs a little more blocking across the shoulders so the buttons don't pull in front quite so much. But Clarissa is finished, hoorah, hoorah!

Here's a close-up of the honeybee lace if anyone tackling this project needs a closer look. It's actually much easier than it looks at first, since it involves a logical series of decreases:


Feels good to have all of these done -- then on to the next projects!

Sunday, December 25, 2011

To all who celebrate it, Merry Christmas from our house!

You shoulda seen the purple and magenta sunrise, because my camera sure didn't do justice to it! So dawned Christmas morning.


We unstuffed the stockings first, then had a hot breakfast of eggs, potatoes, and chicken-and-apple sausage. As you can see, Number One Son got coal in his stocking, but it's the peppermint and chocolate kind from Trader Joe's.


The tree was all a-glow, with presents underneath.


Even the kitties got some new toys, which Belle promptly drooled all over.


After breakfast, we unwrapped the gifts, which was mostly "just what I wanted!" thanks to Amazon's handy wishlist feature.


My "just what I wanted" gift came in a box ready to assemble:


And quickly assembled into a cute little Schacht Cricket Loom! Hoorah! Tomorrow I will warp it and set forth to learning how to weave.


I also got a stack of books, and behind them, a Jeeves clock, a.k.a. a  Good Morning Madam Talking Alarm Clock that wakes one gently with slightly apologetic phrases voiced by Stephen Fry.


Next, it's off to Christmas dinner at my mother's house.

Saturday, December 24, 2011

Where's Santa? NORAD knows!

If you've all been good little knitters and you know Santa's on the way, maybe you'd like to know exactly where he is at the moment. Fret not, NORAD has it covered.


Just go to NORAD Tracks Santa and find out where the eight tiny reindeer are landing at any given moment.

Friday, December 23, 2011

Seasonal goodies: Jammy Dodger Cookies

And again with the butter cookie theme, the last of this year's Christmas treat baking was a homemade version of the very English Jammie Dodgers. Every bit as good, I'm sure, and even better when made with real butter and homemade plum jam.

They may not have been in Grandma's recipes, but I'm sure she won't mind me using her wedding china to model them.
Jammy Dodger Cookies

Cream together thoroughly 2/3 cup of butter and 1/2 cup of sugar. Add 2 tablespoons of milk, 1 egg, and 1 teaspoon of vanilla.

In a separate bowl, mix together 2 1/2 cups of flour, 1/4 teaspoon of salt, and 1/4 teaspoon of baking soda.

Add the flour to the butter mixture and mix lightly until blended.

Roll out on a floured surface to about 1/8th inch thick. Cut with a round 2-1/2 inch cookie cutter. Place half of the rounds on a baking sheet and spread a teaspoon of jam or jelly in the middle. Add a thin smear to the outer edges to help the layers stick together. Use a small cookie cutter to cut a hole in the middle of the remaining rounds, or cut a hole with a knife. Lay these rounds on top of the jam-covered rounds. Dip a fork in sugar and gently press the edges together.

Bake at 350 degrees F for 12 to 15 minutes until lightly brown.

Just for extra, I took the tiny cut-outs, brushed them with jam, dipped them in colored sugar, and baked them about 8 minutes for teeny sugary butter cookies.

Seasonal goodies: Mint roll-up cookies

This is a new recipe this year, though it's from an older cookbook. From my choices this year it's clear that my idea of "best Christmas cookie" is a very buttery butter cookie or shortbread cookie with various flavors. Must be all those butter-and-sugar sandwiches my mother gave me when I was small, back in the day when butter, sugar, and white bread were supposed to be good for you. As usual, I take a recipe and immediately start making it my own, so this is my version of the ingredients and procedures:

Mmm, mint, chocolate, and butter, the Christmas food groups!

Mint roll-up cookies

Cream together thoroughly 1/2 cup of sugar and 1/2 cup of butter. (C'mon, it's Christmas. Use the real thing. Get it from a local creamery if you can.)

Add 1 egg, 1 teaspoon of vanilla, and 1/4 to 1/2 teaspoon peppermint or spearmint extract (depending on how minty you like your cookies).

Divide the mixture into two bowls. To one bowl add 1 oz of melted unsweetened chocolate and 1 tablespoon of unsweetened powdered cocoa (all melted chocolate makes the dough too soft, all cocoa powder makes it too dry, I found).  Tint the mixture in the other bowl with a few drops of green food coloring.

Mix 3/4 cup of flour with 1/4 teaspoon baking powder and 1/8 teaspoon salt. Add this to the chocolate mixture. Mix another 3/4 cup of flour with 1/4 teaspoon baking powder and 1/8 teaspoon salt together and add it to the green butter mixture. Stir each gently until blended. Add a small amount of milk if the dough is too dry to hold together.

On a floured surface, roll the chocolate dough out into a rectangle about 7" x 12 inches. Roll out the green dough to the same size. Brush the chocolate dough lightly with milk and lay the green dough on top of it (it helps to roll it up on the rolling pin to transfer it). Roll lightly to make the two layers stick together. Brush the top of the green dough with milk and roll the rectangle up, starting on one of the long sides, brushing the floured surface of the chocolate dough as needed to make the roll stick together. Wrap the roll in plastic wrap and refrigerate at least one hour.

Lice the roll into 1/4 inch slices and lay them about 1 inch apart on a cookie sheet. Bake at 375 degrees F for about 9 minutes.

Wednesday, December 21, 2011

I've got the best knitting group ever

Seriously. I do. When I hear about this or that other group getting uptight or negative or gossipy, I look at mine and wonder, "Why would they want to do that when they could get along and do good things for each other like we do?"

Like just tonight -- Long story here but to summarize, one gal in the group went from engaged and a bright future to breakup, single mom again, and facing homelessness all in one go. Some friends came through with the deposits for an apartment for her, and folks from the knitting group have been amassing and offering things she needs for the apartment.

And tonight we threw her a party.

Lots of folks came. We filled the ballroom in the IKE Box, brought goodies, brought our knitting...


And brought presents. I brought a much-needed book case, some small toys and goodies for the kids, and some lovely Malabrigo worsted. Other folks brought more housewares and toys and yarn.


So our gal went home with a lot of good stuff to help her get set up in her new place and make sure that she and the kids have a lovely Christmas.

I've got the BEST knitting group EVER!

Tuesday, December 20, 2011

Seasonal goodies: Spiced nuts

This is a new one this year, sent as a recipe in a pack of coupons from our grocery store. Of course the minute I looked at it I took it apart like a knitting pattern and thought, "I could add this, but oh, take out that, and I'd do this part this way..." I took out the Worcestershire sauce straight off, since I've got a seafood allergy and Worcestershire sauce has anchovies in it. The results of my fiddling were pretty darn good, and while not quite the knock-your-socks-off effect of my blanched almond recipe, these are a lot faster to make.

It's all in the presentation, yanno. Trés chic.
Spiced nuts


Start with 6 cups of raw mixed nuts of your choice. I used one cup each of walnuts, almonds, filberts, cashews, Brazil nuts, and macadamia nuts. Mix them together in a big bowl.

In a small saucepan, melt 3 tablespoons of butter. Add 1/2 teaspoon ground coriander, 1/2 teaspoon ground cumin, 1/4 teaspoon of garlic powder, 1/4 teaspoon of smoked paprika (if you have it -- if you don't, you can get it at Nichols Nursery), dash of black pepper, 1-1/2 teaspoons of salt, 2 tablespoons of brown sugar, and 2 teaspoons of soy sauce. Pour this mixture over the nuts and toss them until well coated.

Spread the nuts out in a pan with sides. Roast at 350 degrees until toasty, which will take about 15-20 minutes. Stir every 5 minutes. Test them after 15 minutes to see if they're crunchy enough to suit you.

Once roasted, spread the nuts out on paper towels to cool.

We knit in a gingerbread house!

The place where my knitting group meets is the IKE Box, formerly a mortuary (!), converted into a coffee house, meeting place, band venue, and the home of Isaac's Room Foundation, which provides services to at-risk youth.

It looks like this:


But when I went for spinning last Sunday, it looked like this:


and like this:


Someone had done up a beautiful scale model of the building in gingerbread, with lots of seasonal trimmings.

They even got some spiffy details in. I saw that the roof was dusted in powdered sugar "snow," and noticed a couple of scratch marks. I thought, "Aw, someone had to go and mess it up," until I looked closer and realized...


... those are the marks of a sleigh and eight tiny reindeer!

Monday, December 19, 2011

In a creative mood: "My Gal Friday" commences

For years I've had a 1940s knitting magazine in my collection that had several sweaters on my mental "must knit someday" list. I finally decided I was going to tackle one of them, and of course I chose the one that has instructions for one size only, no indication of finished dimensions, a given gauge but doesn't state whether it's over the pattern stitch or stockinette, and calls for a yarn that no longer exists and that I can't find any information for. Yeah, yeah, no problem.


Creating this sweater in a size that fits me is going to require some restructuring and rewriting of the pattern. What's more, it's knitted in separate pieces, as most sweaters were, but even the front/neck band is knitted separately and sewn on. While I could do that, I thought, "Why?"

So in addition to mapping it out for my size, I'm also going to design a pattern where the body is knitted in one piece. I haven't decided what to do about the front band. I could, I suppose, knit it in moss stitch as part of the body. Or pick up and knit separately. At any rate, while I'm engineering it for my size, I'm figuring out how it could be knit in other sizes. Then I'll line up some test knitters and in the end, produce this as a for-sale pattern.

I'm calling it "My Gal Friday," because, well, just look at that model. Doesn't she look like she should be picking up a phone and saying, "Mr. Doodlebug's office, how may I help you?"

Seasonal Goodies: Blanched Almonds

On the Christmas days of my youth, when the kitchen counter was lined with good things to eat, a bowl of Tom & Jerry batter was usually out with a kettle of hot water and bottles of brandy and rum (even the kids ::gasp:: got a little dab just for flavor). This was about the only time in our family that the booze came out, and even then, the Tom & Jerry ritual was done with great moderation. The batter is mostly powdered sugar with egg. Add some hot water and a dab of rum, brandy, or both, and that's a Tom & Jerry. The perfect accompaniment to such a sweet drink was blanched almonds, roasted in butter to a crispy golden brown and salted.

These days we don't do the Tom & Jerry thing. Hubby is a teetotaler, and really, I find that sweet drinks like that are cloying anyway, but the blanched almonds continue because they're just so darned good. There's nothing like them in the stores. They must be made, and since the process is a bit laborious, I only go through it at Christmas time.

Blanched almonds. The vintage Fostoria bowl is traditional, but optional.

Blanched Almonds

Start with as many raw almonds as you want to deal with. Four to six cups is about right for a batch. Put the raw almonds in a large metal or glass bowl. Pour over them enough boiling water to cover them completely. Let them sit until the skins loosen and can slide off easily. Spend the next hour or two popping almonds out of their skins. Refresh with more boiling water if needed. Spread the almonds out on a towel to dry thoroughly. Usually this takes overnight.

The next day, melt a few tablespoons of butter. Put the almonds in a bowl and toss them with butter until they're coated. Spread the almonds out in a pan with sides. Roast in the oven at 350 degrees F until golden brown, stirring every 5 minutes. Depending on the type of pan, this can take anywhere from 15 to 30 minutes. In a glass pan it took me nearly 30 minutes. Check frequently and watch for the almonds to turn golden brown. This is important. They shouldn't just be touched here and there with brown, but should be golden brown all over. They must be roasted to a delightfully crispy crunch. Once they start to turn, watch closely, because they can go from golden brown to over-brown in just a few minutes.

Once they're roasted to a turn, spread the almonds out on paper towels to cool. Sprinkle with salt. Taste them. Now you know why it's important to go through this ritual at least once a year. Try not to eat them all in the same day.


Sunday, December 18, 2011

Seasonal goodies: Peppermint Puffs

Christmas cookies! Would it be Christmas without them? When I was a kid, my paternal grandmother started baking for Christmas, oh, probably right after Thanksgiving. Or Halloween. She was way into cookie baking, and produced cans and jars and boxes of cookies, fudge, rocky road candy, and divinity to cover a card table two layers deep. Seriously. Her cookie output was prodigious. She always baked the family traditional old world cookies -- mainly Lebkuchen, Pfeffernusse, and Springerle -- and added a few new ones that she'd decided to try. From my mother's side of the family came the fabulous Peppermint Puffs, which became a "must have" cookie each year. They're a buttery soft shortbread cookie with crushed peppermint candy and a crunchy, sugary coating.

These days I bake mostly to please myself. I don't strive for Grandma's cookie output, and I don't feel obliged to produce ALL of the traditional cookies. But Peppermint Puffs are still my Number One Cookie that I make each year. This year I got all wild and crazy and made some spearmint ones, too. Maybe I'll even try cinnamon.

But mostly I bake them only at Christmas, 'cause if I ate buttery cookies like that all years I'd be a butterball myself.

So without further ado, I bring Peppermint Puffs to the rest of the blogosphere.

Grandma's cookie recipe. On Grandma's fine china. Supposedly the Roosevelts used this pattern in the White House.
Peppermint Puffs


Cream together until soft and fluffy: 
3/4 cup butter (or margarine if you must but NOT shortening) 
1/4 cup sugar 
1 egg yolk (save the white because you’ll need it) 
1 teaspoon real vanilla (accept no substitutes!)
Mix in: 
1/2 cup crushed peppermint candy (or spearmint)
2 cups all-purpose flour
The mixture will be crumbly, but should hold together when pressed. Roll the dough into 1 inch balls. If using real butter, refrigerate the doughballs for at least one hour. (Otherwise, upon baking, one tends to get peppermint flats instead of puffs.)
Add about two teaspoons of water to the egg white. Whisk together until foamy. Roll the doughballs in egg white, then in granulated sugar.
Bake at 350 degrees F for 15 minutes. Remove from pan immediately and let cool on a rack. It’s helpful to use a nonstick pan, or line the baking sheets with parchment paper.

Saturday, December 17, 2011

The Ghost of Christmas Crafting Past

We have a pretty fair collection of Christmas ornaments. Not anything like the collection my parents had, since my Dad liked to hit the drug stores after Christmas and see what ornaments were on sale. If we'd used all the ornaments collected over the years, we would have had to put up three or four trees. Well... we did live on a Christmas tree farm so that wouldn't have been entirely out of the question. But we didn't.

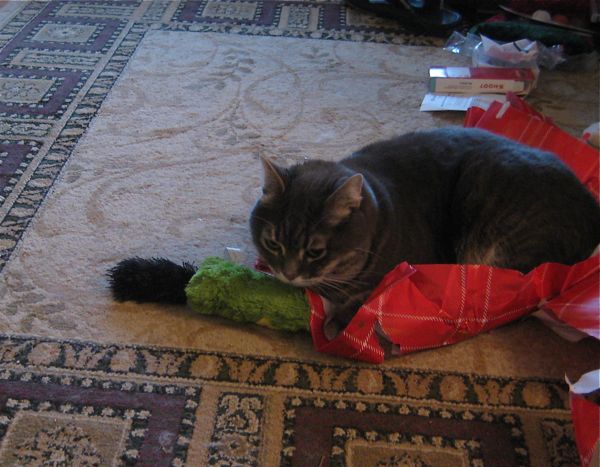
Still, my collection would cover large tree as thickly as any gift shop display. Since we put up small tress these days — less for the cats to knock over, though they haven't done so yet — I only get out some of the ornaments and leave others. Some I've bought. I adore old-fashioned shiny glass ornaments in all kinds of shapes and figures. Some I've made. So, in a crafty theme, here are a few of my handmade ornaments and the stories behind them.

Starting with:


I wanted some gold shine on the tree one year, maybe ten or fifteen years ago, and saw some pretty gold lamé ornaments. Thinking I could make some myself, I found some gold fabric. The only kind I could find was quilted, so I used it to make quilted stars and crescent moons.

This snowman:


And this tree:


began life only a few years ago as plain glass ornaments from the craft store for decorating. I used window sticker paints to paint them up all pretty.

This little critter peeing out of a stocking:


is made of polymer clay. I have a pattern for this in felt, but thought I could make something smaller and shinier from polymer clay. I rolled the red and the white very thin to make the stocking, and inserted a wire loop between the white border and the red for a hanging loop. Miss Mousie is dimensionally modeled in brown clay with pink in her ears and bright beady black eyes, accented with white. Some tubes of sparkle glue made the adornments, and the whole thing was coated with acrylic floor wax and baked for a hard, shiny finish.

Going back in time to my cross-stitching days over twenty years ago:


What's it say? It says "Merry Christmas" in Czechoslovakian. I made it for my grandmother, whose parents immigrated from Bohemia when Bohemia was still a country of its own, back when Queen Victoria was sitting unamused on the throne of England. Grandma didn't speak a lot of Czechoslovakian, but her parents spoke it at home when she was young.

This one:


is done in counted bead work on cross-stitch fabric using vintage glass beads I got from my other grandma. I crocheted the border with vintage rayon thread, sewed it to a white satin back, and stuffed it. The ornament won a blue ribbon at the State Fair.

And these:


are real eggshells. I cut the fronts out with embroidery scissors, washed them well, and peeled out the membrane. I painted the outsides with multiple layers of fingernail polish for color and strength -- pearly white for the one on the left, metallic cherry red for the one on the right. The lace is crocheted from gold thread on a tiny vintage crochet hook. I crocheted the poinsettia on the left from sewing thread on the same tiny hook. The one on the right has a tiny bell, with little leaves of holly cut from green ribbon. Even though I used ordinary nail polish from the drug store, no fancy-schmancy brand, it's held up for well over twenty years. Made hash of my nails (I must be sensitive to acetone or something), but makes eggshells last forever.
 

blogger templates | Make Money Online